Video hàng đầu

Ý TƯỞNG BỮA SÁNG TUYỆT VỜI VÀO CUỐI TUẦN
Tôi dám chắc là bạn có ít nhất một trái trứng trong tủ lạnh, có nghĩa là bạn có thể chuẩn bị một bữa sáng siêu ngon lành và nhanh gọn. Xem video này và bạn sẽ tìm được rất nhiều ý tưởng về cách làm những món ngon lành từ trứng. Điều hay nhất là bạn khong cần phải có kỹ năng nấu nướng gì đặc biệt hay có nhiều nguyên liệu. Bắt đầu với ý tưởng về một bữa sáng lành mạnh - trứng chiên với ớt chuông. Đúng, món này cực dễ luôn! Đặt ớt chuông vào chảo rán. Đập trứng và cho vào ớt chuông rồi chiên trong vài phút. Một lựa chọn bữa sáng lành mạnh khác cho những ai đang ăn kiêng đây - trứng bác bằng túi nhựa. Trộn tất cả các nguyên liệu trong túp và luộc chúng trong chảo. Ta-da! Bạn đã bao giờ thử làm món trứng cuộn chưa? Tôi yêu món trứng cuộn phô mai vì chúng cực kì ngon lành. Hãy xem hướng dẫn từng bước nhé! Một cách bảo quản trứng trong thời gian dài là làm đông lạnh chúng. Đặt trứng vào khay đá silicon và đông lạnh chúng. Lấy một chiếc chai nhựa rỗng và trộn sữa chua, trứng, đường và bột mì với nhau. Và giờ bạn có thể làm bánh pancake bằng chai rồi đấy. Bạn thậm chí còn có thể làm cả bánh bông lan nữa. Hãy xem hướng dẫn nhé!
Chúng tôi chia sẻ một cách pha cà phê cực hay với trái cam. Hãy xem hướng dẫn siêu đỉnh này! Một công thức điên rồ khác là gà nấu dưa hấu. Tôi cá là bạn chưa biết nó ngon đến thế nào đâu!
DẤU THỜI GIAN:
00:09 Công thức nấu trứng tuyệt đỉnh
01:20 Ý tưởng bữa sáng ngon miệng
08:38 Mứt homemade
09:30 Sandwich trứng
12:48 Trứng cuộn phô mai
------------------------------------------
Kênh tiếng Việt chính thức của 5-Minute Crafts
Soi Sáng Youtube: https://bit.ly/2TPVZhq
CHUYỆN KỂ CÓ THẬT: https://bit.ly/2kkDoP7
123GO! Vietnamese: https://bit.ly/2m3P6y2
Music by Epidemic Sound: https://www.epidemicsound.com/

NHỮNG CÔNG THỨC NẤU MÌ NGON TUYỆT MÀ BẠN CHƯA HỀ THẤY TRƯỚC ĐÂY
Mì sợi là một trong những món ăn ngon nhất ngoài kia, nhưng hôm nay thậm chí bạn còn có những công thức làm mì ngon hơn thế nữa, bạn có thể thử cho bữa sáng, bữa trưa hoặc bữa tối của mình đó.
Bạn có thể làm mì nghiền khoai tây, bằng cách trộn khoai tây nấu chín trong máy xay cùng một ít sữa và bơ. Sau đó, bạn đổ hỗn hợp này vào bát và đổ đầy nó với một ít nước dùng nhé.
Bạn cũng có thể làm mì pasta đầy màu sắc, bằng cách luộc một ít bắp cải cùng một ít baking soda. Sau đó, bạn nấu mì của bạn trong đó và hãy xem thành phẩm nào.
Bạn có thể làm món ức gà trông giống như miếng gà KFC. Đơn giản lắm, chỉ cần cắt một ít ức gà thành từng miếng nhỏ, nhúng nó vào một ít kem và nước sốt chua và sau đó lăn nó qua một bát mì đã được bẻ vụn.Tiếp đó thì cho nó vào chảo dầu và xem bạn có món gì nhé.
Thay vì làm bánh gạo, bạn có thể làm bánh sợi mì trong lò nướng đó. Lấy một ít mì nấu chín và trộn chúng với một số trứng và đường. Sau đó, đặt chúng vào khay muffin và để nấu chúng trong vài phút. Sau đó, bạn có thể phủ chúng với một ít kem và nước sốt sô cô la và thưởng thức thôi nào. Đây là một công thức bánh ngọt dễ dàng và ngon miệng đó.
Dấu thời gian:
1:04 - Thủ thuật thiên tài với mì
2:46 - Bánh mì sợi ngon
3:42 - Xúc xích tẩm bột ngô mì ngon tuyệt
6:21 - Pizza mì ramen tuyệt vời với lò nướng
7:48 - Công thức làm xúc xích ngon
Video này được thực hiện cho mục đích giải trí. Chúng tôi không đưa ra bất kỳ sự bảo đảm nào về tính đầy đủ, an toàn và độ tin cậy. Bất kỳ hành động nào bạn thực hiện dựa theo thông tin trên video này đều tự chịu rủi ro và chúng tôi sẽ không chịu trách nhiệm cho bất kỳ thiệt hại hoặc tổn thất nào. Trách nhiệm của người xem là sử dụng có phán đoán, chăm sóc và phòng ngừa nếu có kế hoạch bắt chước, mô phỏng.
Video sau đây có thể có hành động được thực hiện bởi các diễn viên của chúng tôi trong môi trường được kiểm soát - vui lòng sử dụng biện pháp phán đoán, chăm sóc và phòng ngừa nếu bạn dự định sao chép.
------------------------------------------
Đăng ký 5 PHÚT THỦ CÔNG https://bit.ly/2F0If0m
Soi Sáng Youtube: https://bit.ly/2TPVZhq
CHUYỆN KỂ CÓ THẬT: https://bit.ly/2kkDoP7
123GO! Vietnamese: https://bit.ly/2m3P6y2
123 GO! Challenge Vietnamese: https://bit.ly/35f0N6r
Music by Epidemic Sound: https://www.epidemicsound.com/
Tài liệu chứng khoán (hình ảnh, cảnh quay và khác):
https://www.depositphotos.com

Ý TƯỞNG VÀ HƯỚNG DẪN MAKEUP TUYỆT ĐẸP BẠN SẼ THÍCH THỬ
Hôm nay tôi sẽ chỉ cho bạn vài mẹo thông minh để bạn thử nâng cấp kỹ năng trang điểm của mình. Những hướng dẫn này cũng sẽ cho bạn vài ý tưởng về cách tạo ra vẻ ngoài rùng rợn cho Halloween và cách thử nghiệm giúp nó trông như thật. Tôi cũng sẽ chỉ cho bạn vài món đồ tự làm như là làm chất dẻo đắp mặt, cách làm máu giả từ mật ong, và nhiều thứ nữa.
Trong video đầu tiên này, tôi sẽ chỉ bạn cách dùng băng dính xám để trông như nó giữ mũi bạn với nhau. Đơn giản là dùng chì kẻ mắt vẽ theo đường băng dính và dùng chất dẻo đắp mặt dính lên quanh vùng đó thôi. Phủ bên trong hình vuông bằng sơn vẽ mặt màu đỏ, thêm che khuyết điểm xung quanh là xong rồi đó.
Bạn cũng có thể thử thứ gì đó huyền bí hơn, ví dụ như hướng dẫn trang điểm tiên cá nè. Đơn giản là bạn cần một cặp quần tất lưới và chút nhũ mắt màu sắc là xong.
Dấu thời gian:
0:55 – Makeup kiểu khoá zip
2:13 – Đục mắt bằng bút chì
3:49 – Hướng dẫn trang điểm với vàng đỉnh cao
6:20 – Tự làm đạo cụ makeup
8:26 – Ý tưởng makeup điên rồ
9:57 – Makeup kiểu người già
11:51 – Tự làm chất dẻo phủ mặt
Video này được thực hiện cho mục đích giải trí. Chúng tôi không đưa ra bất kỳ sự bảo đảm nào về tính đầy đủ, an toàn và độ tin cậy. Bất kỳ hành động nào bạn thực hiện dựa theo thông tin trên video này đều tự chịu rủi ro và chúng tôi sẽ không chịu trách nhiệm cho bất kỳ thiệt hại hoặc tổn thất nào. Trách nhiệm của người xem là sử dụng có phán đoán, chăm sóc và phòng ngừa nếu có kế hoạch bắt chước, mô phỏng.
Video sau đây có thể có hành động được thực hiện bởi các diễn viên của chúng tôi trong môi trường được kiểm soát - vui lòng sử dụng biện pháp phán đoán, chăm sóc và phòng ngừa nếu bạn dự định sao chép.
------------------------------------------
Đăng ký 5 PHÚT THỦ CÔNG https://bit.ly/2F0If0m
Music by Epidemic Sound: https://www.epidemicsound.com/
Tài liệu chứng khoán (hình ảnh, cảnh quay và khác):
https://www.depositphotos.com

Here's just a clip of what I like to do for fun when i'm in-between filming.
Make sure to subscribe for more behind-the-scenes videos, as well as regular live streams!
#withme

Sleeping bag liners offer everything from a little additional warmth to protection from iffy travel bedding. Check out this video to learn how to pick the best sleeping bag liner for you. Then head into your local REI to feel the liners for yourself, or click here to shop our selection: https://baylenvietnam.com/prod....uct/cheap-travel-sle
------------------------------------------------
At Recreational Equipment, Inc. (REI), we love to get outside and play, and we know first-hand the importance of quality outdoor gear. We stand behind all our products with a 100% satisfaction guarantee, and we design our own line of award-winning REI brand gear and clothing. Whether you're new to outdoor adventure or a seasoned pro, we gladly share our enthusiasm for our products—and the trails, slopes and waterways where we play.
Shop REI.com: https://www.rei.com/
Take a class: https://www.rei.com/learn.html
Travel with REI: https://www.rei.com/adventures
Learn something new: https://www.rei.com/learn/expert-advice
Find a trail: https://www.rei.com/h/adventure-projects
Read: https://www.rei.com/blog
REI Membership: https://www.rei.com/membership/benefits

You might be missing out on a better motorcycle camping experience if you don't have the right gear. Although a sleeping bag liner may seem trivial and insignificant, it is an important part of your sleep system, worth some consideration. This is a quick video talking about the pros and cons of different types of sleeping bag liners as well as a brief discussion of why they are so important.
⏬⏬⏬
📗 THE FUNDAMENTALS OF MOTORCYCLE CAMPING BOOK: https://baylenvietnam.com/prod....uct/cheap-travel-sle
⏬⏬⏬
🏡 WEBSITE: http://ftaadventures.com
🤝 JOIN PATREON: https://bit.ly/2GWdcDN
🏍️ BUY A TANK OF GAS: https://bit.ly/2ujl1vb
🎁 SEND A GIFT: https://amzn.to/33KhKEH
⏬⏬⏬
👍ITEMS MENTIONED IN THIS VIDEO AND GEAR I RECOMMEND (Some of these are affiliate links)
⚬ Wacaco Nanopresso: http://www.wacaco.com?aff=275
⚬ Surviveware FAK & Wet Wipes: https://surviveware.com/?rfsn=2868901.153d6c
⚬ AltRider: www.altrider.com
⚬ RMATVMC: https://www.rockymountainatvmc.com/?ref=1013
⏬⏬⏬
👕MERCH
⚬ SHIRTS AND HATS HERE: https://bit.ly/2uUSdfE
⚬ STICKERS HERE: https://bit.ly/3dKYmvS
⏬⏬⏬
📧CONNECT WITH ME
⚬ Website: http://ftaadventures.com
⚬ Facebook: https://bit.ly/2GYLyG2
⚬ Instagram: https://bit.ly/2JqVIxJ
🎬 SUGGESTED VIDEOS:
⚬ NEW HERE? START HERE: https://youtu.be/LOolCTPHvQk
⚬ BAJA MEXICO ADVENTURE: https://youtu.be/FOINhVnAxVk
⏬⏬⏬
🏍 WHO IS TIM COLLINS OF FTA ADVENTURES? (FORMERLY FORTY TIMES AROUND)
A lifelong adventure enthusiast and a long time motorcycle traveler, I have spent the last few years honing my craft as a motorcycle adventure specialist. I am currently living full time on my motorcycle, a 2015 BMW R1200GS named Lupe.
Motorcycle travel and camping have become my largest passions in life. I have a meticulous nature that helps me analyze gear, technique and tactics in a way that is highly beneficial to anyone looking to embark on a motorcycle venture of any scope.
Be sure to subscribe and hit the bell so you don't miss anything: https://bit.ly/2GD0I4sI have the first copy of the book and wanted to give you an inside look at how it all came out. Now that I have approved the book in its current form I have ordered copies for the presale and will be shipping them out in a few weeks. I am super excited to get them out to you and see what you think!
If you want to learn more about the book check it out here:
📗 THE FUNDAMENTALS OF MOTORCYCLE CAMPING BOOK: https://bit.ly/2BlSrQZ

UPDATED RANKING ►► https://baylenvietnam.com/prod....uct/cheap-travel-sle
Best Seller in 2020 ►► https://baylenvietnam.com/prod....uct/cheap-travel-sle
Disclaimer: These choices may be out of date. You need to go to fishfindly.com to see the most recent updates to the list.
Our complete review, including our selection for the year's #Best_Sleeping_Bag_Liners , is exclusively available on #FishFindly.
These 10 Best Sleeping Bag Liners Video Buying Guide Included Products Are:
1. Sea to Summit – Reactor Extreme – Thermolite Mummy Sleeping Bag Liner
►https://amzn.to/30esE7U
2. The Friendly Swede Travel and Camping Sheet Sleeping Bag Liner
►https://amzn.to/34VKzQh
3. Coleman Stratus Adult Fleece Sleeping Bag Liner
►https://amzn.to/31HPdiD
4. TETON Sports Sleeping Bag Liner
►https://amzn.to/2OeTWUY
5. Sea to Summit Premium Silk Travel Sleeping Bag Liner
►https://amzn.to/2OkADcS
6. Outcry Travel and Camping Sheet Sleeping Bag Liner
►https://amzn.to/31Qr6i1
7. ALPS Mountaineering Brushed Polyester Mummy Sleeping Bag Liner
►https://amzn.to/30C2yYn
8. Cocoon Silk Mummy Sleeping Bag Liner
►https://amzn.to/31HiUAe
9. Vumos and Camping Sheet Sleeping Bag Liner
►https://amzn.to/2V5jOnV
10. Sea to Summit Coolmax Adaptor Traveller Blue One Size Sleeping Bag Liner
►https://amzn.to/2Odgx4l
When it comes to camping, sleeping bag liners can be a vital piece of equipment which will help to keep you warm and act as a barrier between you and your sleeping bag. The best sleeping bag liner will provide you with an extra level of comfort and allow your bag to stay cleaner for longer.
Choosing the best liner for sleeping bag though involves taking a few key areas into account as there can be a big difference between products when it comes to weight and the temperature rating. After that there are other key considerations such as the material, fit and breathability among others.
Most Recent Picks: https://www.fishfindly.com
----------------------------------------------------------------------
👊Follow Our Official Social Media ! Tons of awesome stuff 🔥🔥
⏩https://www.facebook.com/FishFindly/
⏩https://twitter.com/fishfindly/
----------------------------------------------------------------------
Full Transparency For Our Audience:
Links above are our affiliate links to Amazon Associates or other related programs. We may earn a commission if you purchase through our links.
----------------------------------------------------------------------

Bàn cắm trại Zempire Kitpac
If you’re looking to add some style and practicality to your campsite, then the Kitpac Table from Zempire is just what the doctor ordered.
With a durable yet sleek bamboo top, weatherproof aluminium frame, a secure leg lock design, adjustable leg height, space for four people, and a cheeky bottle opener feature – what’s not to like about this cool yet functional table?
In this video, our gear guru Ben talks us through the specs and packed dimensions, how to set it up and adjust the legs, and more so keep on watching for all the details on this nifty camp table!
For more information on the Kitpac Table from Zempire, head to Snowys here:
Standard: https://www.snowys.com.au/kitpac-std-camp-table
Large: https://www.snowys.com.au/kitpac-large-camp-table
0:00 - Intro
0:28 - Packed dimensions
0:36 - Setting up the table
1:35 - Weight & rated capacity
1:41 - Materials
1:59 - Dimensions

This is my third flight on a new wing. A Niviuk Kougar 3, 23m2, testing the trim speed range, and testing out some Insta360 cameras at the same time.
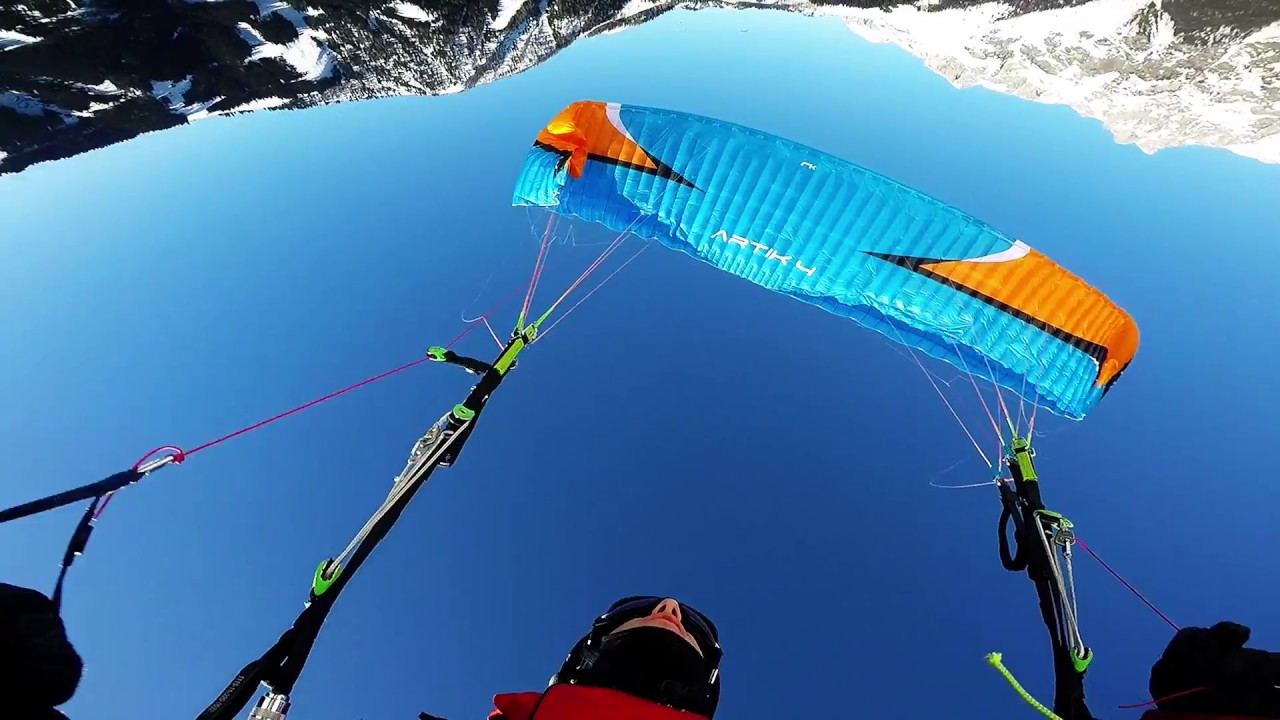
Testing collapses on the Niviuk Artik 4 23m². Details: https://tbergmueller.wordpress.....com/2017/02/22/find
Some Remarks:
Frontstall (0:03): Starts to fly again on its own, yet a little break input is needed to open it again.
Asym. Collapse / Seitenklapper #1 (0:20) : A single bump of the break (applied early!) reopenes the glider perfectly.
Asymm. Collapse / Seitenklapper #2 (0 :45): Without input the glider goes to auto-rotation / spiral dive (trying to pump in the rotation expectedly did not work ;)). After letting it turn a bit, I did a minimal weightshift on the opposite side (1:06 , didn't even break), which stops the rotation. In straight flight recovery is easy ;)
Big ears (1:23): Easy and stable, you need to pump them out.
(1:45) Controlling pitch / roll is intuitive and easy.

Advanced sigma 10 vs Niviuk artik 5

Join this channel to get access to perks:
https://www.youtube.com/channe....l/UCqvwY3F4q8r3rO8Lb

http://www.simplyhike.co.uk/pr....oducts/Coleman/48Qua
The Coleman 48 Quart Cooler Combo is fantastic set consisting of 3 parts: a 45 litre large chest cooler, a FlipLid Cooler and also an insulated Jug. Each of the products are made from an extremely lightweight and durable material and can all compact up into the Chest Cooler. They also have an easy grab handle which makes it easier to move the products around freely.

http://www.getoutwiththekids.c....o.uk/products/colema
This is the Coleman Xtreme 33 Litre cool box.
It is a large cool box ideal for family camping.
Ideal for weekend car campers, extended camping trips, scout troops and summer camp.
www.coleman.eu

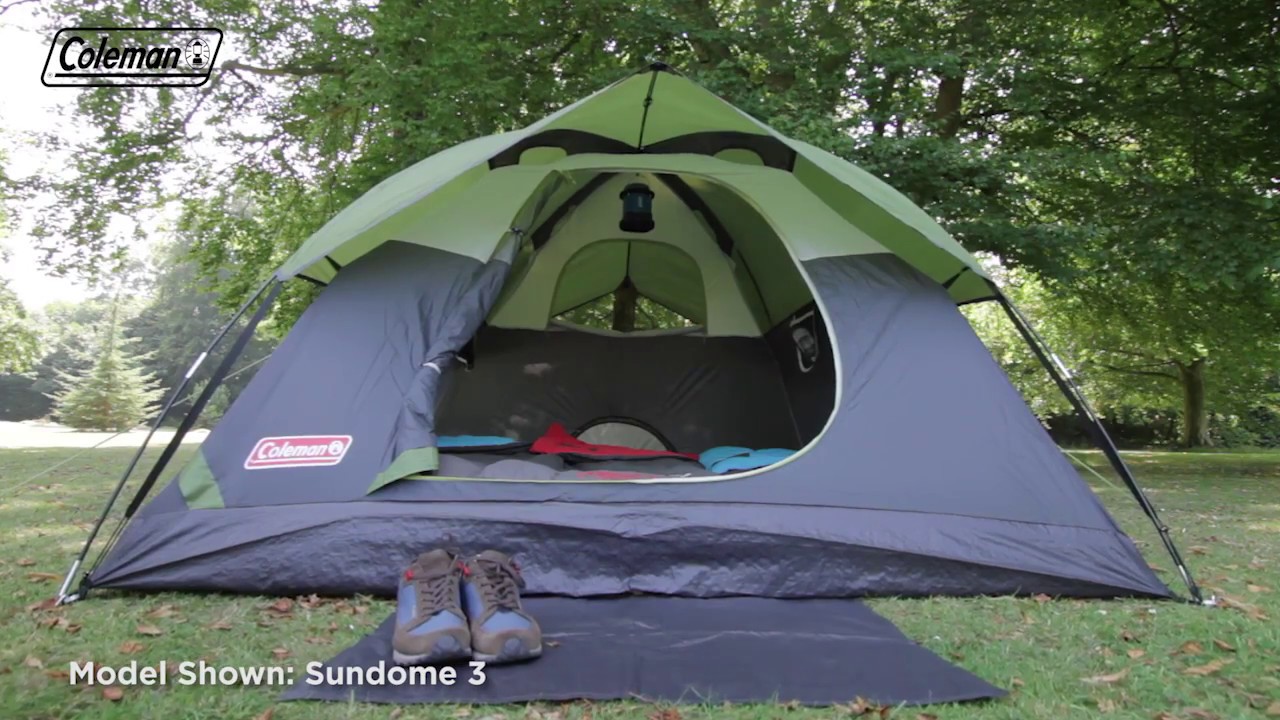
Check out the Coleman Instant Up 4P Lighted Northstar Darkroom Tent here:
https://www.snowys.com.au/inst....ant-up-4p-lighted-no
Featuring a light and heat-blocking fly, easy breezy set up, and LED interior lighting – the the Coleman Instant Up 4P Lighted Northstar Darkroom Tent is the easy choice for family trips away.
In this video, the Snowys crew drove over to the Brownhill Creek Tourist Park to show you how to set up and pack up the Coleman Instant Up 4P Lighted Northstar Darkroom Tent.
Our gear guru Ben starts off by showing you what you get inside the bag, how to orient the tent the right way, peg out the corners, pop up the centre hub and extend the frame to finish setting up the inner. Then he throws the fly over the top, and shows you how to set up the vestibule, and awning.
After that, Ben takes you through the process in reverse to demonstrate how to pack it up for storage or transport – so check it out above for all the details.
0:00 - Intro
1:04 - Packed weight & dimensions
1:14 - What's included?
1:49 - Setting up the tent
2:40 - Popping up the frame
3:14 - Adding the fly
4:59 - Front poles
6:20 - Setting up the awning
7:56 - Packing away the tent

Find it on Zappos.com: https://www.zappos.com/p/Crocs....-Kids/product/945524
Crocs Children and Junior Size Guide
Give them comfort and lightweight style with the Croslite™ constructed Crocs™ Kids Baya Clog!
Classic slip-on design.
Ergonomic styling is anatomically designed to fit your feet.
Built-in footbed nubs promote healthy foot circulation.
Imported.
Measurements:
Weight: 3 oz
Product measurements were taken using size 10 Toddler, width M. Please note that measurements may vary by size.
Weight of footwear is based on a single item, not a pair.

Xin chào mọi người. Đang yên đang lành, tự nhiên mình mua được hàng sale 1k trên sendo, mà còn freeship nữa, phải nói là quá đỉnh luôn. Cục sạc dự phòng Hoco 10.000 mah, với xô bánh quy. Quá Đã!. Nay mở ra cho mọi người xem chơi, ai săn được hàng 1k trên sendo nhớ comment cho mình bên dưới nha.
Cám ơn mọi người đã xem.

- Mọi người đang xem phần 1, xem tiếp các phần tiếp theo nhé:
Phần 2: https://youtu.be/ZpZnLBkDlsE
Phần 3: https://youtu.be/s-hkSP0K0Ws
Trong đợt sale Shopee vừa rồi, mình mua được khá nhiều đơn hàng 1000đ, mở ra 33 gói toàn những món đồ khá thú vị, hy vọng mọi người thích videos này.

A one night redemption camp in the rain after the failed attempt to camp on the mountain a few days ago. A few questions answered in this one including my name. And how I went from Trading Platform design to Investment Banking Fixed Income and Equity Trading to Investing My Own Money in myself. And finally how I became a Youtuber. Hope you enjoy!
Someone asked to list the banks I worked for: Baring Securities, Credit Suisse, Goldman Sachs, Morgan Stanley, Lehman Brothers and Mizuho Securities.
If you'd like to contribute a drink to me or a treat for Bruce: https://www.buymeacoffee.com/abcamping
Youtube: https://www.youtube.com/c/ABOutdoorsandCamping/
Instagram: https://www.instagram.com/ab_outdoors_camping/
Facebook: https://www.facebook.com/ABOutdoorsAndCamping/
Twitter: https://twitter.com/ABOutdoorsNZ
Merch: https://my-store-11715559.creator-spring.com/
#campingwithdogs #CampingInTheWoods #campinginrain
Chapters:
00:00 Intro
00:23 Setting Up Camp - Naturehike Cloud Tunnel Does not go well
17:32 Brew and Cigar Chat
31:18 FENIX LR50R flashlight and Other Gear
38:00 Dinner Sausage Meat Ragu with Pasta
41:00 How I went from Banking to Youtube
1:18:55 Hot Chocolate
1:21:00 My real name.... Drumroll....
1:26:40 Brew and Cigar #2 Chat
1:37:34 Bedtime and Heavy Rain
1:46:24 Good Morning Brucie!
1:49:48 Coffee and Pancakes Chat
2:39:00 Breaking down camp - Tent fail
2:47:00 Thanks for watching!
@Steve Wallis @ROLEX @Fjällräven @Macpac @Enlightened Equipment @Amok Equipment @Naturehike Official Store @Sony I Alpha Universe @DD Hammocks @TrangiaTV @Fenix Lighting USA @Apple
Fenix flashlight: https://www.fenix-store.com/fe....nix-lr50r-multifunct
Tent: https://www.naturehike.com/col....lections/tents/produ
Pillow: https://www.naturehike.com/col....lections/pillow/prod
Sony a6600: https://amzn.to/3bmXAHa
3F UL Gear Tarp: shorturl.at/CNY14
Hilleberg Staika Tent: https://hilleberg.com/eng/tent..../black-label-tents/s
Conundrum Quilt: https://enlightenedequipment.com/conundrum-stock/
Fjallraven pants: https://amzn.to/3uKOcom
Thermarest Pad: https://amzn.to/3tJB69A
MSR Hubba Hubba: https://amzn.to/3eHmfsf
Paracord: https://amzn.to/3oe2co9
Flextail Pad Pump: https://amzn.to/2RPCIlb
Aquaquest Tarp: https://amzn.to/3uIERh0
Wooly Mammoth Blanket: https://amzn.to/3odtFqf
Danchel Tent Stove: https://amzn.to/3bibJ8H
OneTigris Smokey Hut: https://amzn.to/3tCMyEd
Camping Chair: https://amzn.to/39IeYp5
Bivy bag: https://amzn.to/3sROrgG
Zoom h1n recorder: https://amzn.to/3wubGPl
Cooking Grill: https://amzn.to/3fAfo2R
Trangia 27 Stove: https://amzn.to/3f5B9Zw
Trangia 25 Stove: https://amzn.to/34595z3
TOPS Tahoma Knife: https://amzn.to/2T7E7nD
Hiking Poles: https://amzn.to/3yuRnD0
